Screen capturing is an essential feature of any operating system. It helps troubleshooters fix problems remotely, allows us to make neat tutorials and in general, it is just a cleaner way to save interesting snippets right from the monitor to the storage. Most importantly, memes are created that way. We’ll be exploring a few tips in screen capturing – or taking a screenshot, if you will.
Screenshots on Macs
Macs have had nice and clean way of taking screenshots – a few simple keyboard shortcuts. I say “a few”, because a full screen capture isn’t the only thing Macs can do. Plus, they’ve had the ability to skip the process of pasting the screen image and then saving the file like Windows users have had to do, until now.
Full screen capture
All you have to do is use the keyboard shortcut [command][shift][3]. The image of the current screen is saved in full resolution in a PNG file. For easy access it is available right on the desktop. The location can be changed and you’ll soon know how.

The following is what happens after the screenshot is taken.

The file is saved with the name based on the time of the day, so you know when it was taken. The name follows a certain template:
Screen Shot YYYY-MM-DD at H.mm.ss A/P.PNG
Isn’t that handy?
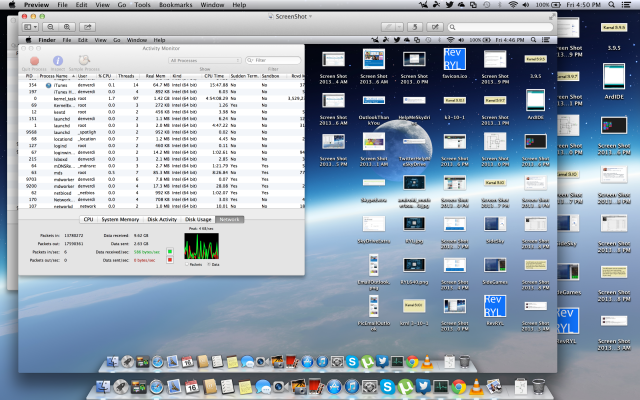
A quick preview at the file reveals how nicely the screen was captured.
Partial screen capture
For partial screenshots, you should use the shortcut [command][shift][4]. This would turn your mouse pointer to a target pointer. Your current pointer co-ordinates will be mentioned around your pointer as well.
It’s difficult to explain here as, you might have already observed, the mouse pointer is never a part of the screenshot. The target pointer should be used to mark the rectangular area to be captured. Press and hold the mouse key and drag it until the rectangle covers the required area. Once the key is released, the file will be saved just like that of a full screen capture.
Partial screen captures are instantaneous after selection of the region. It has to be timed correctly to capture the right frame in a shot that has movement.
Tip:
While partial screen captures are good enough, we’d recommend you use the full screen capture and crop the image to the relevant region. This would make editing easier and more precise.
Full screen capture in multi monitor scenarios
If an external/second monitor is used in the mirroring mode, since they display the exact same thing there will only be one screen shot. However, in extended mode, separate screenshots will be taken for each screen and saved on the desktop with the same time-stamped name appended with the screen number in parentheses. Something like “Screen Shot YYYY-MM-DD at H.mm.ss A/P (screen-number).PNG“.
Capturing screen images into clipboard
Sometimes it isn’t necessary to have an image file of the screen captured. They can immediately be inserted into a Pages/Keynote/Word/Powerpoint document by pasting the image from the clipboard.
To copy the screen image into the clipboard, one must simply hold the [control] key along with the respective shortcuts for the kind of screenshot to be taken. Use [command][control][shift][3] for copying the entire screen into the clipboard or [command][control][shift][4] to copy a part of the screen.
Changing shortcut keys for taking screenshots
The above mentioned ways for taking screenshots works only if the settings are default. That can be changed through the following steps.
1. Launch “System Preferences”
Do it either by visiting Launchpad (pinch with four fingers on your touchpad), or from the dock (assuming you have it there). If not, pick it from the options listed in your Apple menu.
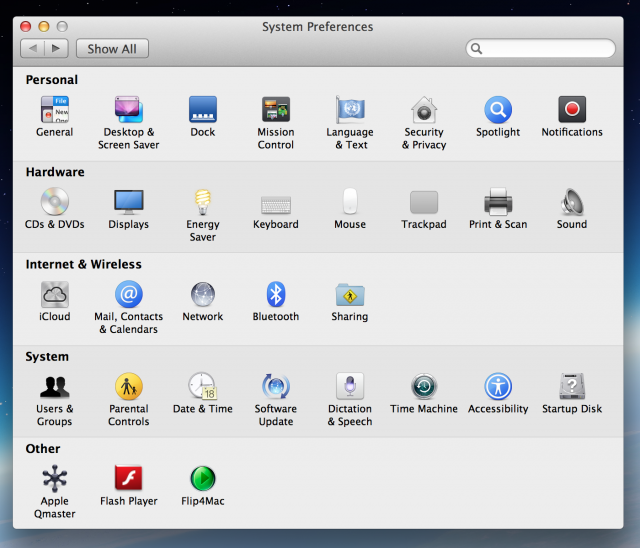
2. Visit Screenshots settings
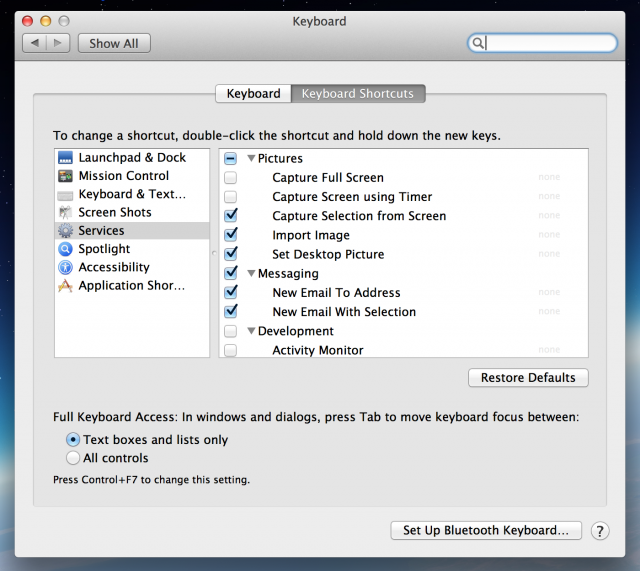
Click on “Keyboard” listed under “Hardware” in System Preferences. In the resulting window open up the “Keyboard Shortcuts” tab.

3. Change Screenshot shortcuts
The rest is pretty clear, but we’ll play. Click on “Screen Shots” in the left column.

As you can see, we’ve mentioned all of them here. They’re the default shortcuts but can be changed to whatever you like, perhaps something easier. However, we recommend that the shortcut should be a 3 key combination to avoid getting accidentally invoked.
Change the location for saving screenshots
If you don’t want screenshots filling up on your desktop, you can change the location where screenshots are saved with a few terminal commands. This is how you do it.
1. Launch the terminal
Do this by searching for “terminal” in Spotlight or via Launchpad. If not use Finder and browser through “Applications” and the “Utilities” folder.
2. Change the location for screenshots
Create a folder wherever you wish screenshots to be saved. Keep the Finder window handy.
Enter the following command and press [return].
defaults write com.apple.screencapture location *location*
Here replace *location* with whatever location you’ve decided.
As an alternate, type everything before *location* and then drag the folder for screenshots on to the terminal window.

The location will automatically appear.

3. Restart your system
In this case restart doesn’t necessarily mean you’ll need to do a warm reboot, although that is an option.
You can simply enter the following in the terminal.
killall SystemUIServer
This will effectively stop the running of UI elements. The system will be in a state of panic for a moment before this component is turned back on now with your new setting in effect. You can take a screenshot now and it’ll be saved in your new location.
To revert this setting just use the location of your Desktop folder in step 2.
Screenshots on Windows
Windows has treated screenshots differently. It has always been more of a troubleshooter’s tool than one who finds amusement in the contents of the display.
Full screen captures into the clipboard
This is as easy as tapping the [Print Screen] key. Even on the most recent of laptops, the Print Screen key continues to exist either as a dedicated key or as an auxiliary. Take a good look at the word “Print Screen” or its variants on your keyboard. If it’s coloured the same as your [Fn] key, you’ll have to use [Fn][Print Screen].
The screen captured will be available in the clipboard ready to be pasted into any document you like. You could just paste it into about anything that accepts images – Paint, Word and Powerpoint.
To save the image as a file just paste it in paint and save it with whatever name you’d like.
There is no way for partial screen captures into the clipboard.
Tip:
Windows screenshots don’t allow videos, playing in Windows Media Player, or some specifically coded games, be a part of the screenshot, so keep that in mind.
Partial screen captures
Partial screenshots can be taken using the Snipping Tool. You’ll need to launch the Snipping Tool from the Start menu under Accessories. For Windows 8 it would be easier to search for it on the Start screen.
The Snipping Tool is an application that will let you capture parts of your screen when active. When ready click on the New button. This will freeze the screen and everything that exhibited movement.

The pointer changes to a target pointer, letting you choose a rectangular area to be captured.

When that is done, you can simply save the file if you like it or give it another try.

Tip:
Use the Snipping Tool only in the desktop mode on Windows 8. It won’t be accessible to use on Windows 8 apps. However, there is evidence it will capture parts of a Windows 8 app if the desktop is snapped with it. Also, like the full screen capture the snipping tool too doesn’t capture video or games.
Assign Snipping Tool a shortcut
The best way to invoke the snipping tool is to assign it a shortcut. Unlike Mac OS, shortcuts have to be assigned to the app itself.
Locate the snipping tool shortcut in the Start menu. If in Windows 8, go into the All Apps screen and locate snipping tool; right click it and click on “Open File Location”.

Right click on the Snipping Tool shortcut in the Start menu (or the window of its file location in Windows 8) and visit its “Properties”.

In its Properties, change the shortcut key from blank to whichever combination you’d like. We like [Control][Shift][3] to keep us free from confusion on Windows running on bootcamp. Apply the changes and give it a try.

Full screen capture in Windows 8
Windows 8, alone, now allows a screenshot to be immediately saved in the Screenshots folder of your Pictures library if you use the new shortcut. All one has to do is press the [Windows] key along with the [Print Screen] key to make it happen. The screenshot will be a PNG file with the name “Screenshot” with the index number in parentheses. The screenshot index is stored in the registry so deleting a screenshot won’t advance the index of the next screenshot.
In Windows 8 tablets screenshots are taken by pressing the physical Windows key and the physical Volume Down key simultaneously.
Multi-monitor handling of screenshots
In Windows, an extend mode display will have one screenshot in which both screen captures are appended to one another in the exact way that they’re extended.
Our thoughts
We’re seriously stunned at how much one could talk about screenshots. It has been too long a post to proofread. Still, we might have missed something and if you know anything we haven’t mentioned we’d be happy to learn it as well.
Do leave us your suggestions/feedbacks/screenshots if you might. Cheers!!!
